
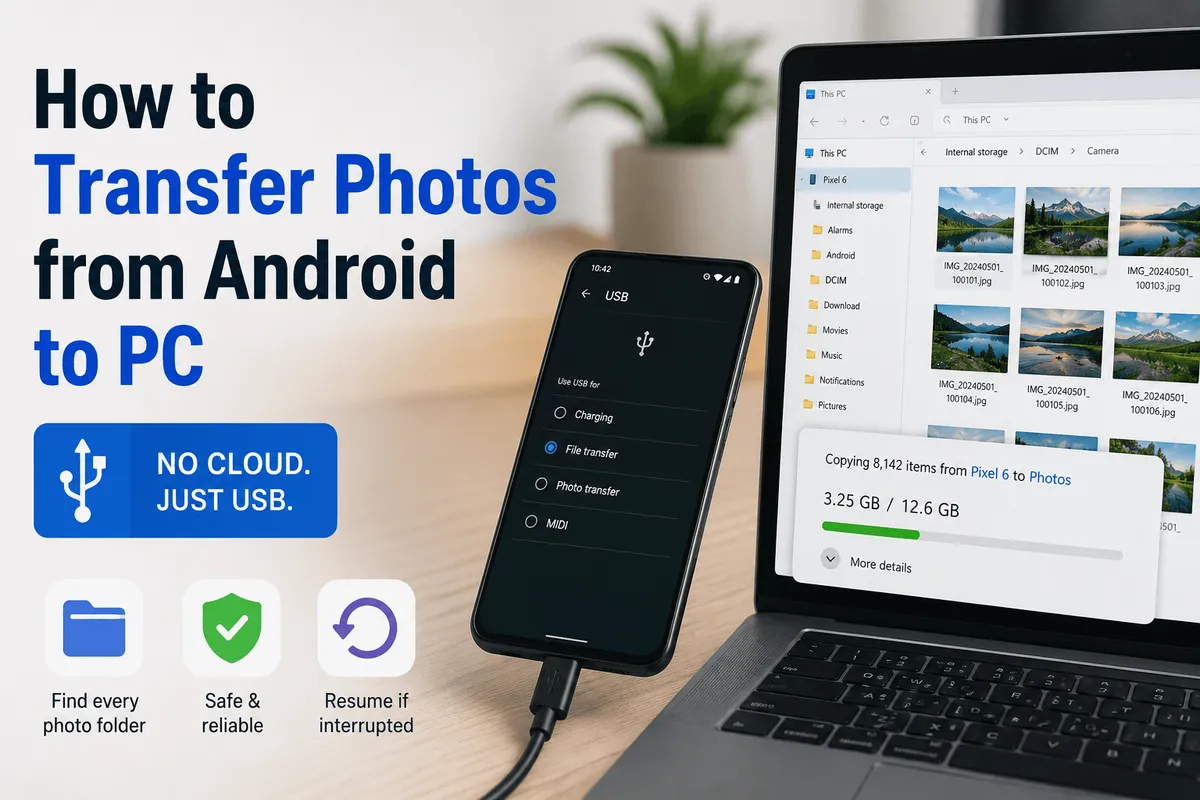
Short answer: connect your Android phone to your PC with a USB cable, unlock the phone, tap the USB notification and switch it from Charging to File transfer. Your phone then appears in File Explorer, and your camera photos live in Internal storage → DCIM → Camera. Drag that folder to your PC and you’re done.
That works fine for a few dozen photos. It gets a lot less fine when you have 8,000 of them. This guide covers both cases: the plain steps first, then what to do when Windows stalls halfway through, when the PC can’t see the phone at all, or when half your pictures won’t open once they land.
Step 1: Set the USB mode to File transfer
This is the single most common reason a PC “doesn’t recognize” an Android phone. By default, most modern Android phones connect as charging only — the data lines stay closed until you say otherwise. Nothing is broken; the phone just isn’t offering its storage yet.
- Unlock the phone (keep it unlocked — a locked screen can drop the connection).
- Plug it into the PC with a USB cable.
- Pull down the notification shade and tap the USB notification — it usually says Charging this device via USB.
- Under Use USB for, choose File transfer (on some phones it’s labelled MTP, Transfer files, or File Transfer / Android Auto).
The phone should now show up under This PC in File Explorer, by its model name.
If you’d rather not do this every time, Android has a Default USB configuration setting under Developer options where you can set File transfer as the default.
Step 2: Know where your photos actually are
Android scatters images across several folders, and most guides only mention the first one. If you copy only DCIM and later find pictures missing, this is why:
| What | Where it lives on most phones |
|---|---|
| Photos and videos you shot with the camera | DCIM/Camera |
| Screenshots | Pictures/Screenshots (or DCIM/Screenshots) |
| Downloaded and saved images | Download, Pictures |
| WhatsApp media | Android/media/com.whatsapp/WhatsApp/Media |
| Telegram, Instagram, other app media | Pictures/<app name> or Android/media/<package name> |
| Camera videos on some phones | Movies |
Do this before you copy anything: open DCIM/Camera on the phone, note roughly how many items and how many gigabytes it holds, and check the other folders above for anything you care about. Knowing the target number is what lets you verify the transfer later instead of hoping.
Method 1: Drag and drop in File Explorer
The free, no-install approach. Open the phone in File Explorer, open Internal storage, and drag DCIM (or just DCIM/Camera) onto your desktop or a folder on your PC.
Good for: a few dozen or a few hundred photos, one-off copies, grabbing a specific folder.
Where it breaks: Android over USB doesn’t expose a real disk. It uses MTP — a protocol built for browsing media, not for bulk file operations. That has real consequences on a large library:
- Explorer can sit on Calculating… for minutes before a single byte moves, because it has to enumerate every file first.
- Thumbnails load slowly or not at all; the window feels frozen.
- A single failed file can abort the whole copy with Device has stopped responding or has been disconnected.
- There is no resume. If it fails at photo 6,000 of 8,000, you start over — and Explorer will happily re-copy the 6,000 you already have, unless you sort out the duplicates by hand.
- Nudge the cable and the phone re-mounts, which ends the transfer.
None of this matters at 200 photos. All of it matters at 8,000.
Method 2: Import with the Windows Photos app
Windows Photos has an Import → From a connected device option that reads the same MTP connection and can auto-organize by date.
Good for: a normal camera-roll import when you want date folders without thinking about it.
Watch out for: it’s built on the same MTP layer, so it inherits the same fragility on very large libraries, and it imports into the Photos app’s own idea of your library. If you want plain files in a folder you chose, on a drive you chose, check the destination setting before you start.
Method 3: Phone Link (wireless, but limited)
Microsoft’s Phone Link pairs your Android phone with Windows over Wi-Fi and shows your recent pictures on the PC, where you can save or drag them across.
It’s genuinely convenient for “I need that one photo I just took.” It is not a backup tool, and Microsoft is upfront about the limits: the photo feature covers only the camera roll and screenshots folders, only the most recent 2,000 images, and videos are not included. Anything older, anything in a WhatsApp or Downloads folder, and every video you own falls outside it.
Google’s Quick Share app for Windows is in the same category — great for sending a handful of files, wrong tool for a library.
Method 4: Google Photos or a cloud drive
Upload from the phone, download on the PC. It works, it’s platform-independent, and it doubles as an off-site backup.
The trade-offs are worth stating plainly:
- Time and data. Tens of gigabytes over home Wi-Fi is an overnight job, and a metered or mobile connection makes it expensive.
- Storage limits. A large camera roll will run past a free tier quickly, and then it’s a monthly bill.
- Quality settings. Compressed upload tiers do not give you back the original file. If you care about originals, check the setting before you upload, not after.
- Getting it back out is its own chore. Bulk-downloading a cloud library to a PC folder is slower and clumsier than the upload was.
If your goal is a real archive on your own drive, the cable is faster and cheaper. If your goal is redundancy against losing the phone, cloud is the right tool — they solve different problems, and using both is reasonable.
Method 5: PhotoPiper — a resumable, verified USB transfer
PhotoPiper for Windows is a native Windows 10 and 11 app built for exactly the case where Explorer gives up: a large camera roll that has to arrive in full.
Connect the Android phone over USB, and PhotoPiper reads photos and videos from its DCIM folder — the camera roll — with the same workflow it uses for iPhones and SD cards. Nothing is installed on the phone, and there’s no Wi-Fi pairing to set up.
If it gets interrupted, it picks up where it left off
This is the difference that matters on a big library. PhotoPiper keeps track of what it has already copied. If the transfer stops for any reason — the cable moves, the phone locks, the app closes, Windows decides to reboot — you just start it again. It skips everything that already made it across and continues with the rest.
No restarting an 8,000-photo copy from zero. No sorting out which files you now have twice. An interrupted transfer stops being a disaster and becomes a pause.
The rest of what it changes:
- You see the total before it starts. PhotoPiper walks DCIM and counts every photo and video, with the full size, so you know what a complete transfer looks like.
- Real counters, not a progress bar. Copied, skipped, and failed are shown as numbers while it runs — so “did it actually finish?” has an answer.
- Duplicates are skipped. It compares by name and content, so you can run it again next month and only new shots get copied.
- Your folder, your rules. Pick any destination — including an external drive — and either organize into
YYYY/MMdate folders or keep everything flat. - HEIC → JPEG on the fly, if your phone shoots in the high-efficiency format (more on that below).
It’s a one-time $19.99 purchase — no subscription, with a 5-day trial that moves up to 100 photos per day, which is enough to run it against your own library and see whether it behaves before paying. It’s available on the Microsoft Store (sandboxed, auto-updating, no SmartScreen prompt) or as a direct download signed by a verified publisher, in native x64 and ARM64 builds.
One honest limit: PhotoPiper reads the DCIM folder. Screenshots, WhatsApp media, and downloads usually live outside DCIM on Android — grab those folders manually in File Explorer, they’re small.
Why some photos won’t open once they’re on the PC
If a copied file shows up as .heic and Windows says it can’t open it, the file is fine — the codec is missing.
Many recent Android phones can shoot in HEIF/HEIC instead of JPEG (usually a “high efficiency” or “advanced picture format” option in the camera settings). It’s a better format — roughly half the size at similar quality — but Windows doesn’t decode it out of the box. Microsoft splits the support into two Store components: HEIF Image Extensions, which is free and handles the container, and HEVC Video Extensions, which is a paid add-on (around $0.99 in most regions) and handles the actual image data. Without both, most HEIC files still fail to render.
You have two ways out:
- Install the extensions and keep the smaller HEIC files.
- Convert during the transfer. Turn on HEIC → JPEG in PhotoPiper and the files land as JPEG, ready to open in any Windows app — no codec, no converter, no second pass.
If you want to stop the problem at the source, switch the phone’s camera back to JPEG. That only affects future photos; the ones already on the phone stay HEIC.
Troubleshooting: the PC doesn’t see the phone
Work down this list in order — the first two solve most cases:
- Check the USB mode. Charging means no file access. Switch it to File transfer (Step 1 above).
- Try a different cable. Many bundled and cheap cables are charge-only, with no data wires at all. Use the cable that came with the phone, or one you know has moved data before.
- Unlock the phone and keep it unlocked during the whole transfer.
- Use a port on the back of a desktop PC, directly on the motherboard — skip hubs, docks, and front-panel ports.
- Restart both devices. MTP connections do get stuck, and this genuinely clears it.
- Check the phone’s file manager first. If the photos aren’t in the folder you expect, no PC-side tool will find them.
Which method should you use?
- Under a few hundred photos, one time: File Explorer. It’s free and it’s right there.
- One specific photo, right now: Phone Link or Quick Share.
- Off-site backup, and you don’t mind the wait: Google Photos or a cloud drive.
- A whole library that has to arrive complete, verified, and survive an interruption: a cable and a tool built for it — PhotoPiper for Windows.
FAQ
How do I transfer photos from Android to PC without a cable? Use Phone Link, Quick Share for Windows, or a cloud service such as Google Photos. Phone Link only covers your 2,000 most recent camera-roll and screenshot images and doesn’t handle videos, so wireless is best for a handful of files rather than a full library.
Why doesn’t my PC recognize my Android phone? Almost always the USB mode. Android connects as charging-only by default — tap the USB notification on the phone and choose File transfer. If the notification never appears, the cable is likely charge-only.
Where are photos stored on an Android phone?
Camera photos and videos are in DCIM/Camera. Screenshots are usually in Pictures/Screenshots, and app media such as WhatsApp lives under Android/media/<package name>.
Can I transfer photos from Android to PC without Google Photos? Yes. A USB cable copies files directly from the phone to the PC — no account, no internet connection, nothing uploaded.
Why won’t my Android photos open on Windows? They’re probably HEIC files. Windows needs both the free HEIF Image Extensions and the paid HEVC Video Extensions to display them, or you can convert them to JPEG during the transfer.
What happens if the transfer stops halfway through? With File Explorer, nothing is saved — you start the copy over and deal with the duplicates yourself. PhotoPiper remembers what it already copied: run it again, and it skips those files and continues with the ones still left on the phone.
Does PhotoPiper work with Android as well as iPhone? Yes. Connect any Android phone over USB and PhotoPiper imports photos and videos from its DCIM folder — the same workflow it uses for iPhone and SD cards.
Transfer keeps dying halfway through? See Android Photo Transfer Keeps Failing? MTP Fixes. Moving an iPhone library instead? See How to Transfer Photos from iPhone to Windows Without iCloud.
Try PhotoPiper for Windows — 5-day trial, up to 100 photos a day. One-time $19.99, no subscription.